
Your First Ansible Playbook: A 10-Minute Guide to Checking SQL Server Version
Sep 13, 2025
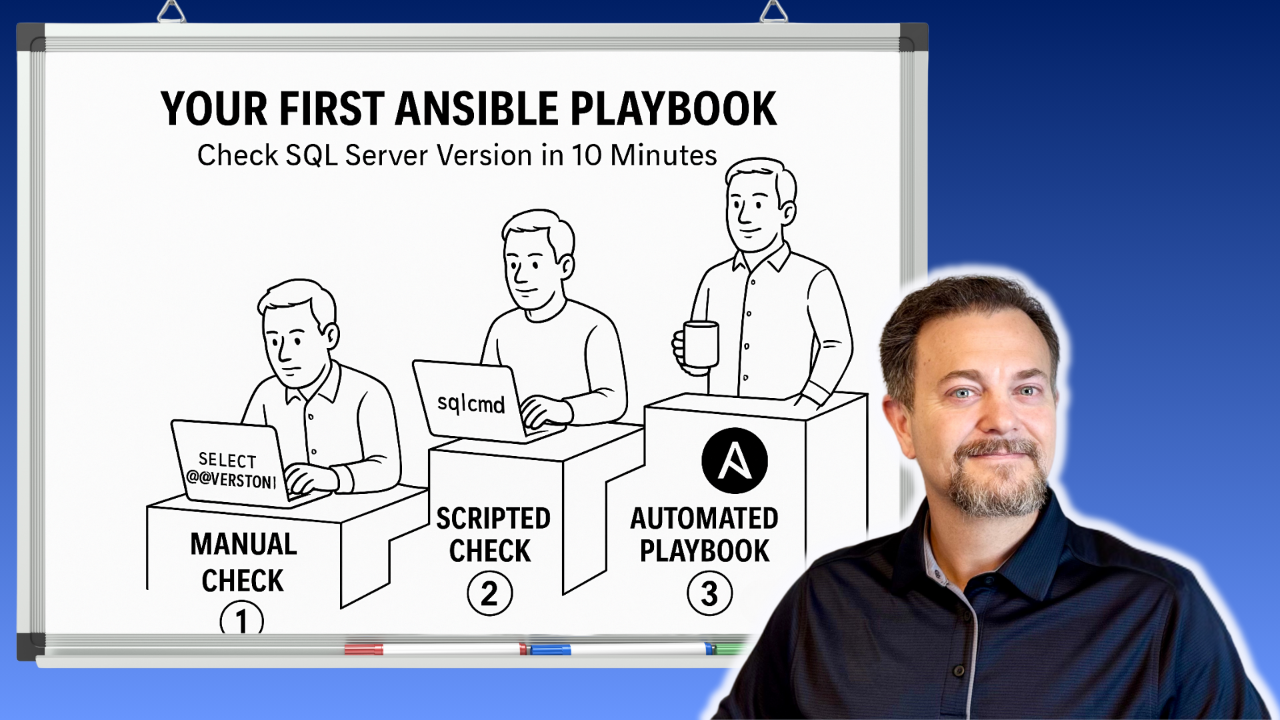
Last week, we talked about the two paths a DBA's career can take: the reactive, problem-fixing "Mechanic" and the proactive, system-designing "Architect." You're here because you know the future is in building systems, not just fixing them.
But the journey from Mechanic to Architect can feel daunting. It's one thing to talk about orchestration; it's another to actually do it.
You, the experienced DBA, are ready for that next step. But you're facing a familiar problem: your day is filled with small, repetitive tasks, and you might not have anywhere to test (if that's the case, check my Automated Sandbox Framework). Logging into a server just to check its version or patch level is a perfect example. It's a tiny task, but multiply it by dozens of servers and it becomes a significant time sink.
This is the very definition of "Mechanic" work, and it's a roadblock to doing the high-impact, strategic work you're capable of.
I've been there, and I can tell you that you don't need to spend weeks researching to start making a change. You can take your first real step toward becoming an Architect in the next 10 minutes. I'm going to give you a clear, simple plan to build your first piece of real automation.
This is a simple, four-step plan to create a working Ansible playbook that automates the tedious task of checking your SQL Server version.
Step 1: Ansible Installation and WinRM configuration
If you're brand new to Ansible, I've built a guide for that. You can find it here. It covers what Ansible is and several concepts you need to know about as you start leveraging this tool. Also, it's a quick setup using Windows Subsystem for Linux, but the same applies if you have access to a Linux machine.
Once you're set up, come right back here.
Step 2: The Inventory
Ansible needs to know which servers to manage. You do this with a simple text file called an inventory. Create a file named inventory.ini and add the servers you want to manage.
Here's an example of my environment. It consists of 4 SQL Servers defined in the "sqlservers" group, with connection variables defined below it. These are needed so that Ansible knows how to connect to our managed nodes (target servers).
[sqlservers]
SQL1.SANDBOX.LOCAL sql_instance_name="DEFAULT" sql_port=1433
SQL2.SANDBOX.LOCAL sql_instance_name="DEFAULT" sql_port=1433
SQL3.SANDBOX.LOCAL sql_instance_name="DEFAULT" sql_port=1433
SQL4.SANDBOX.LOCAL sql_instance_name="INSTA" sql_port=1433

[sqlservers:vars]
ansible_connection=winrm
ansible_winrm_server_cert_validation=ignore
ansible_port=5986
ansible_winrm_transport=kerberos
ansible_winrm_kerberos_delegation=true
ansible_winrm_operation_timeout_sec=60
ansible_winrm_read_timeout_sec=90
ansible_winrm_kinit_mode=managed
ansible_winrm_kinit_cmd=kinit
Next, we'll define our playbook.
Step 3: The Playbook
You could think of the playbook as your blueprint. What should occur to the list of servers, or in our case, instances, defined in the inventory?
Create a new file named playbook_checkVersion.yml. It's a simple, human-readable set of instructions. Copy the following into the file:
---
- name: Check SQL Server version
  hosts: sqlservers
  gather_facts: false

  tasks:
    - name: Set the server_instance variable conditionally
      ansible.builtin.set_fact:
        server_instance: "{% if 'DEFAULT' in sql_instance_name %}{{ inventory_hostname }}{% else %}{{ inventory_hostname }}\\{{ sql_instance_name }}{% endif %}"

    - name: Run version query
      ansible.windows.win_powershell:
        script: |
          [CmdletBinding()]
            param(
              [Parameter(Mandatory=$true)]
              [string]$ServerInstance
            )
            (Invoke-SqlCmd -ServerInstance "$ServerInstance" `
            -Query "SELECT SERVERPROPERTY('ProductVersion') AS ProductVersion" -encrypt optional).ProductVersion.ToString()

            $Ansible.Changed = $false
        error_action: Stop
        parameters:
          ServerInstance: "{{ server_instance }}"
      register: sql_version_result

    - name: Display the version
      ansible.builtin.debug:
        msg: "The version for {{ server_instance }} is: {{ sql_version_result.output[0] }}"
What's it doing?
Before running the playbook, let's break it down.
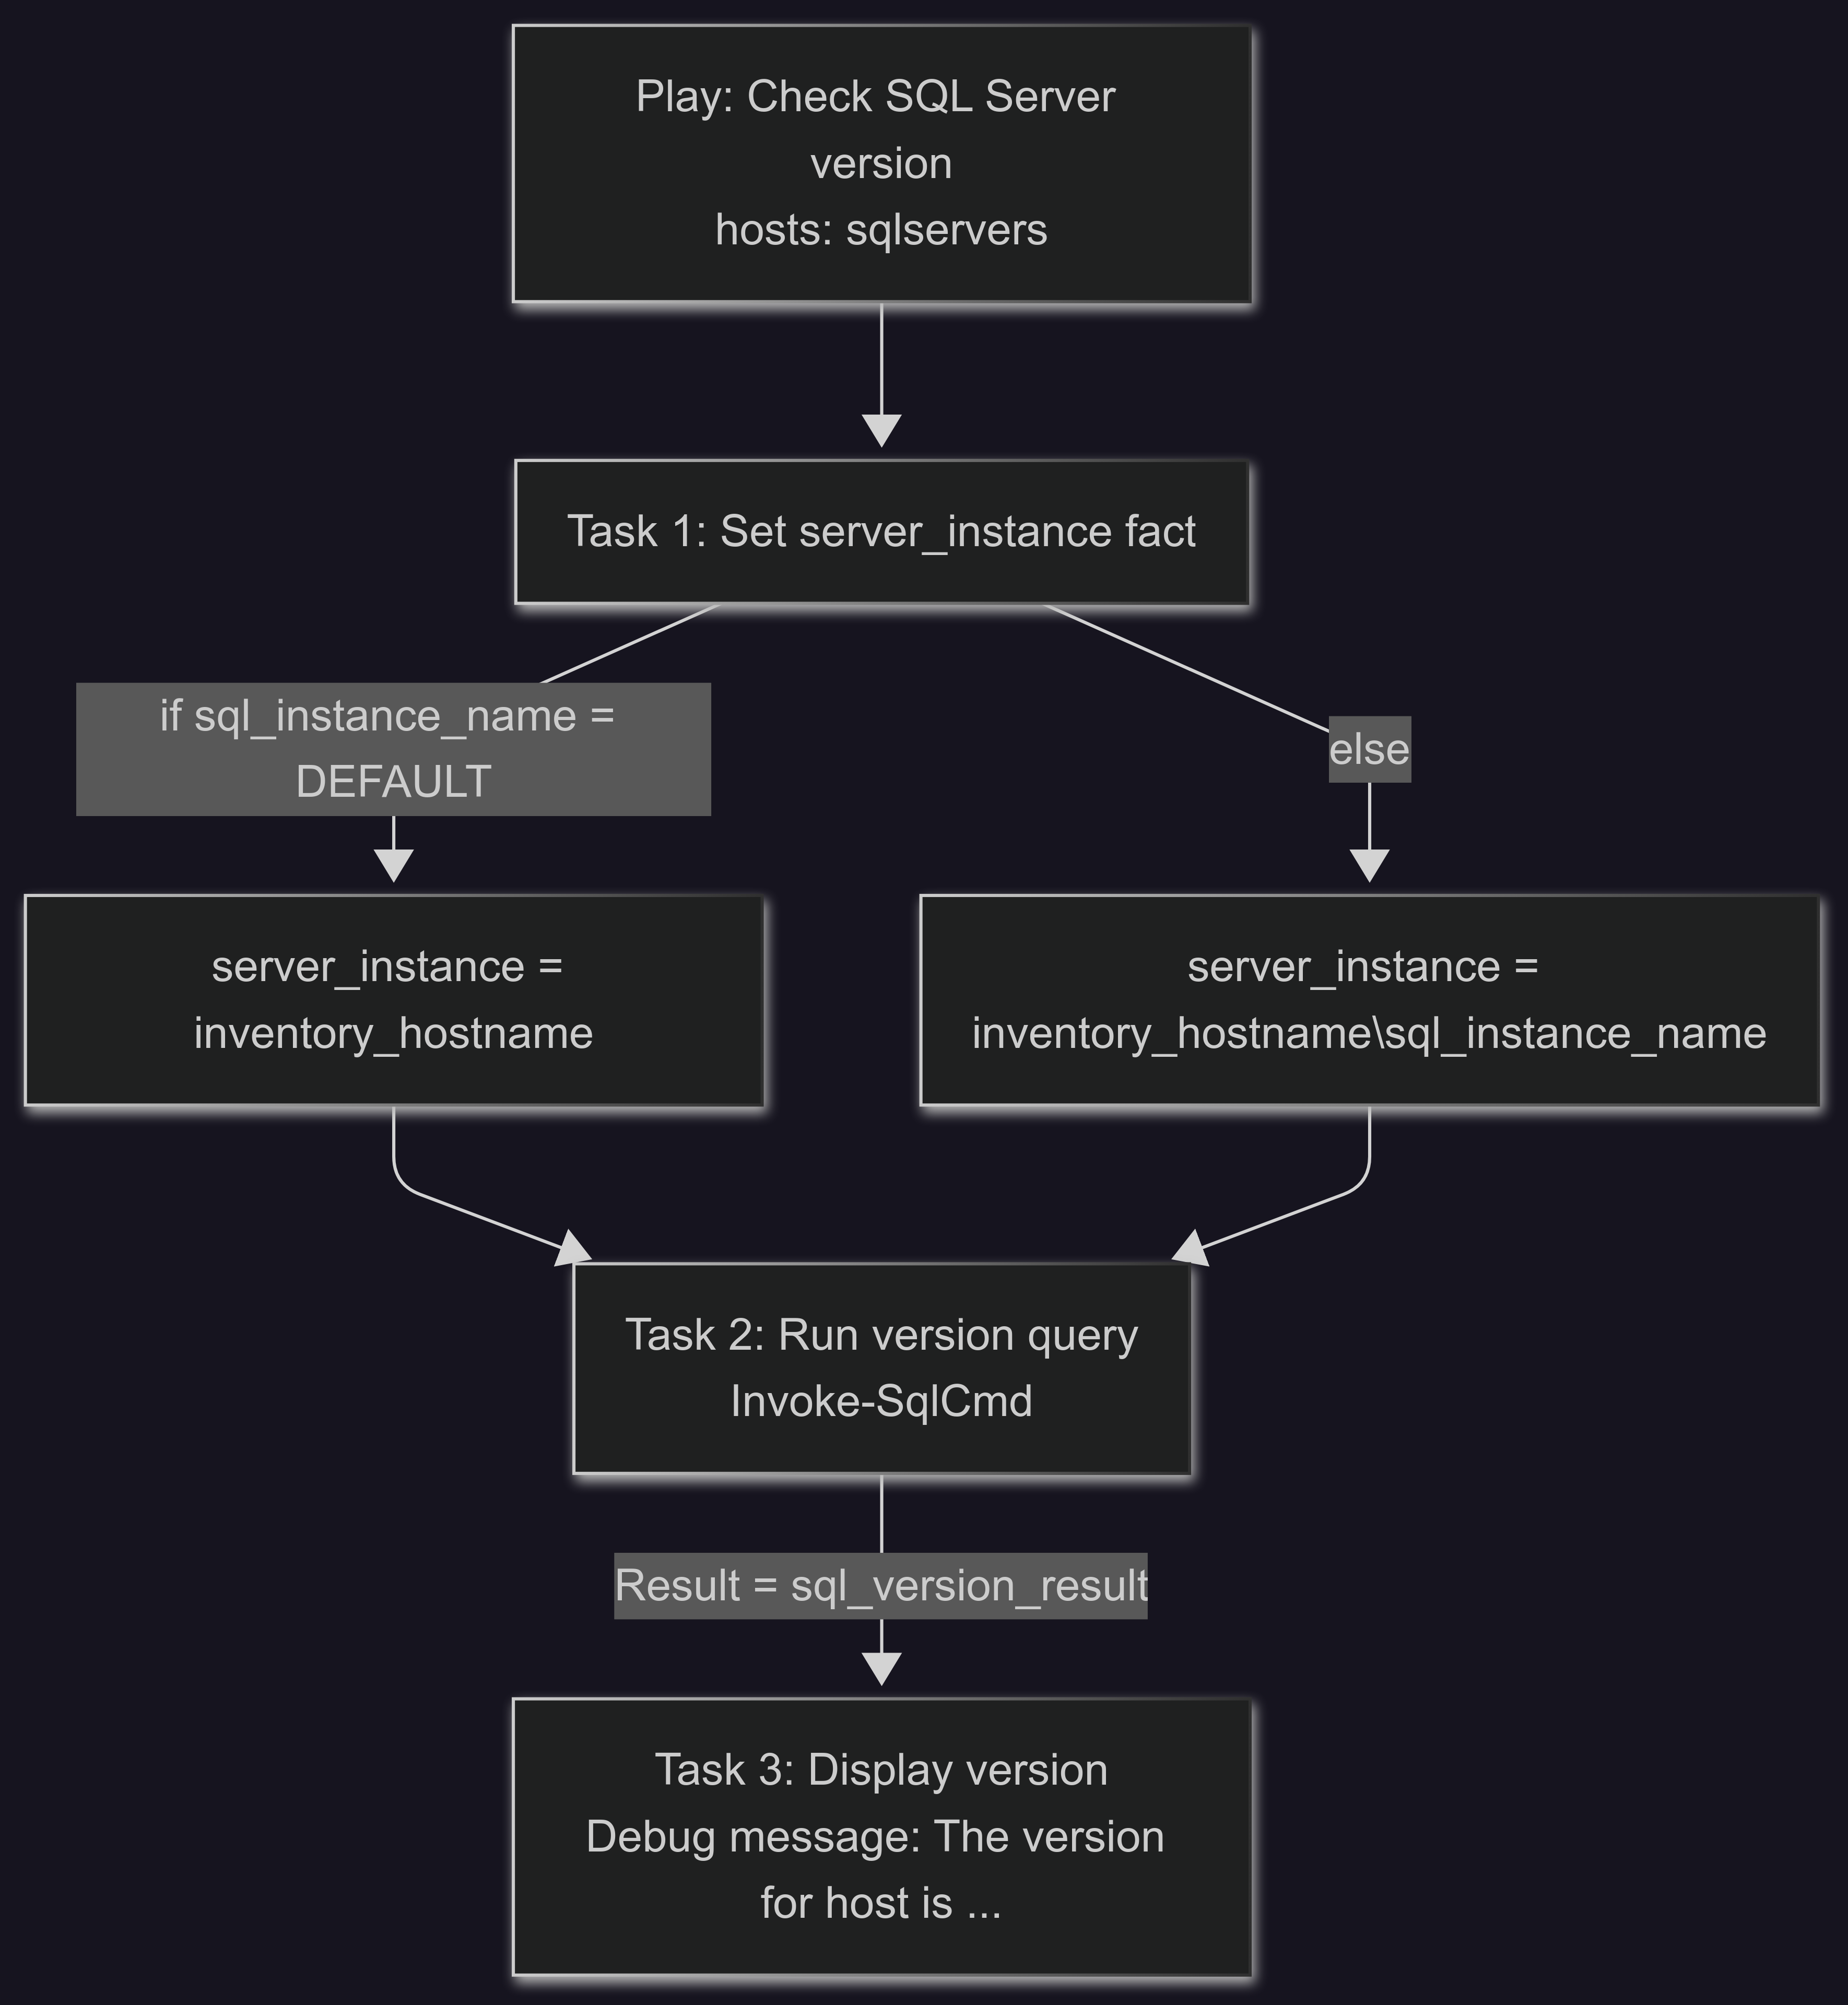
Play - A play refers to a set of actions you want to execute on your managed nodes. We've defined the Check SQL Server Version play to execute on a group of managed nodes (hosts), sqlservers (group), which is defined in the inventory.ini inventory file. There's a key difference in how Ansible runs these tasks and how a PowerShell script would run them.
- Ansible
- The control node (where you run ansible-playbook) connects to each managed node.
- Tasks (modules or scripts) are executed locally on each managed node. Not on the controller (there are scenarios in which you do want the play to run on the controller, but we'll cover that some other time). This play has three tasks: Setting a fact for the SQL Server instance, getting the SQL Server version, and returning the version to the console. Facts are covered in the guide you downloaded previously (you did download it, right?).
- The controller just sends the instructions and parameters, waits for results, and aggregates them.
- This means tasks run in parallel across hosts(within the strategy), and each node independently reports back its "changed/ok/failed" status.
- PowerShell script:
- By default, a PowerShell script runs on the host where you launch it.
- Unless you explicitly add remoting(e.g., Invoke-Command -ComputerName ... or WinRM sessions), the script doesn't fan out.
- Even with remoting, execution is still initiated and coordinated by that one host, not pushed in parallel by a central orchestrator like Ansible.
Tasks - Each task executes a module with specific arguments, and by default, Ansible executes each task in order, one at a time, against all machines matched by the host pattern (in our case, within the sqlservers group).
- Task 1 - Build the server_instance fact (variable) conditionally. If we've defined sql_instance_name as "DEFAULT" within the inventory, then we know the next task just needs to run using the server name (SQL1.SANDBOX.LOCAL). If it's set to anything else, then server_instance needs to include both the server name and instance name (SQL4.SANDBOX.LOCAL\INSTA - the assumption here is that the browser service is running and the instance name can be used to connect to SQL Server). This is a simple use case for Jinja2 syntax (an extremely powerful but simple technique for building conditionals).
- Task 2 - Using the ansible.windows.win_powershell module, run Invoke-SqlCmd and the specified query to retrieve the SQL Server version. You're probably already familiar with this commandlet, but this is an example of how you can leverage PowerShell directly from your Ansible playbook. We "register" the results from this query into the sql_version_result variable.
- -ServerInstance: Tells PowerShell which instance to connect to.
- -Query: The SQL command to retrieve the product version.
- -encrypt: This one isn't shown, but depending on which version of Invoke-SqlCmd your server has installed, you may need to add it.
- register: Saves the output for the next step.
- Task 3- Next, the playbook returns the version of each managed host defined in the inventory file. We use Ansible's built-in debug module to do this. You'd typically use these results in additional tasks (such as is the case of patching SQL Server only if the build version is less than the target version).
Step 4: Run Your Playbook!
Now, from your terminal, run this one command. FYI, you'll need to run it using an account that has permission to run the query defined in the playbook. In my case, that's using an Active Directory account.
ansible-playbook playbook_checkVersion.yml -i inventory.ini -u [email protected] --ask-passYou'll receive a prompt to provide your account password.
Result:
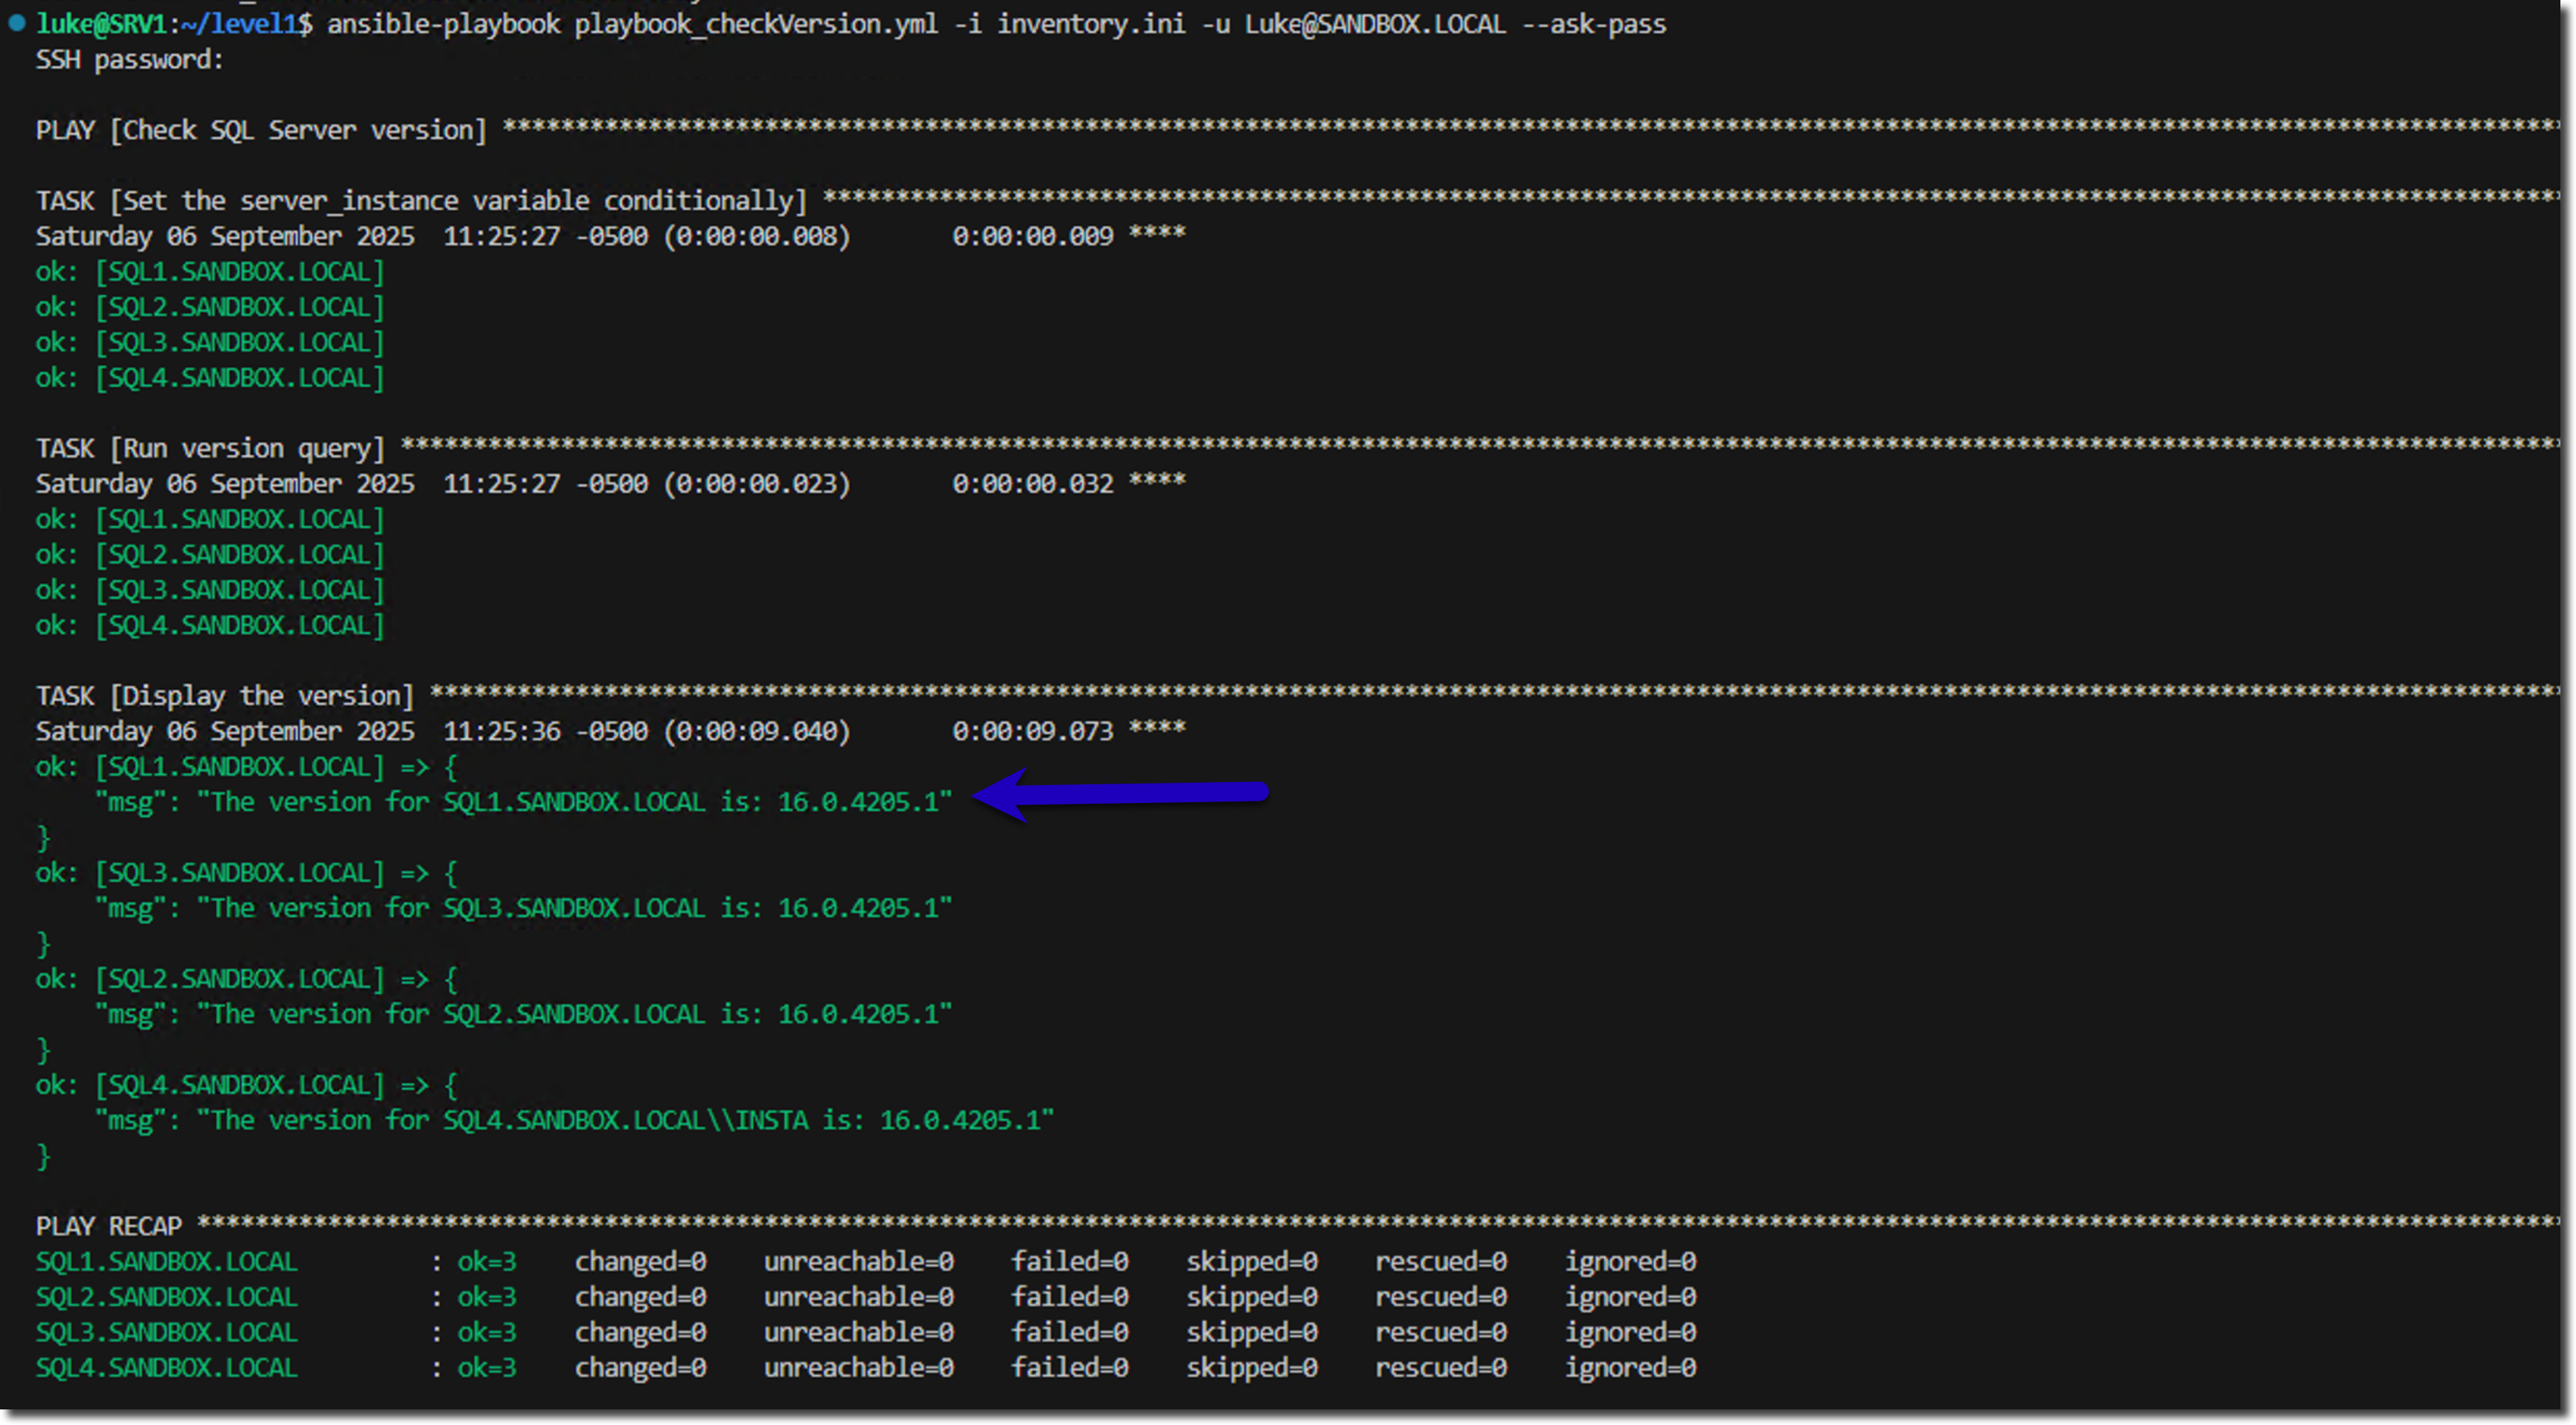
Congratulations! You didn't open up SQL Server Management Studio, nor did you RDP into a box. You described a desired outcome in a simple text file and let the system execute it. You just built a repeatable, scalable process that will take less time than logging in manually. If you have 100 servers, add them to the inventory and watch it scale. No changes to the playbook required. Just add your servers to the inventory and watch it go.
Conclusion
Now, this is a simple use-case, and you may be thinking, "Luke, I can do this just as fast from within SSMS using its built-in feature to run a query against multiple instances, or PowerShell alone. How is Ansible going to help me do it faster?" Fair enough, and I was right there with you on that before I started using Ansible in depth.
One of the most valuable reasons to use Ansible is idempotency. The ability to run your automation over and over again while only making the change when required. It is the single most important principle of reliable automation.
Come back next week and we'll cover Idempotency in detail.
The Database Platform Automation Roadmap
Move from checklists and scattered scripts to desired-state Ansible playbooks—so you can stop wondering whether production still matches what you built. Includes the 60-second self-audit and 23-page field guide (PDF).